A Patchwork Shirt
- Sharon Prigan

- Dec 3, 2025
- 4 min read
When I finish a sewing project, I almost always end up with fabric remnants. These small pieces are too good to toss, so I save them for future projects. Recently, after making a patchwork tunic, I found myself with some leftover patchwork fabric. At the same time, I spotted a piece of t-shirt fabric in a coordinating color in my stash. That sparked an idea: why not combine these two fabrics to create a new garment? The result was a cozy patchwork shirt with a cowl neck and long sleeves. In this post, I’ll walk you through how I made this patchwork shirt, sharing tips for working with mixed fabrics and turning scraps into refashioned clothing.

Gathering Materials and Planning Your Patchwork Shirt
Before starting, gather your materials and plan your design carefully.
Here’s what I used:
Leftover patchwork fabric from my patchwork tunic project
Coordinating t-shirt fabric from my stash
Basic sewing supplies: scissors, pins, sewing machine, thread matching the fabrics
A t shirt for the basic shape instead of a pattern

When working with patchwork fabric, consider its weight and texture. Patchwork fabric can be thicker or uneven due to seams, while t-shirt fabric is stretchy and soft. Balancing these differences is key to a comfortable, wearable shirt.
Tip: Choose t-shirt fabric with some stretch but enough stability to hold the shape of the shirt. A medium-weight cotton jersey works well.
Cutting and Preparing the Fabrics
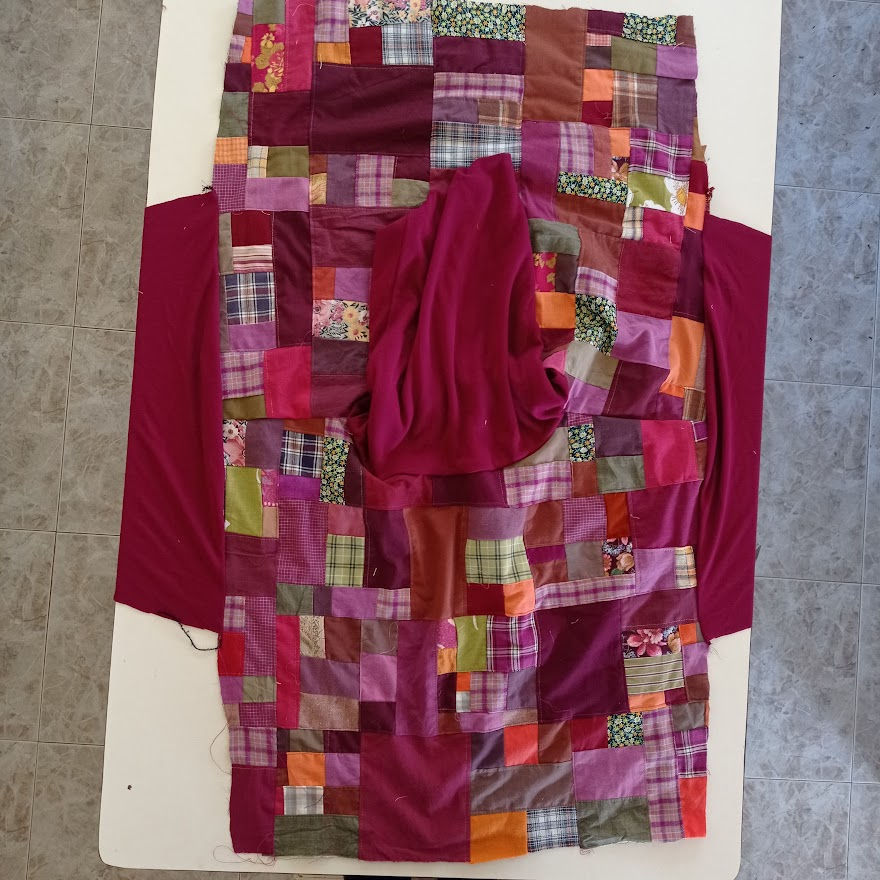
Start by laying out your patchwork fabric Since the patchwork fabric was limited, I decided to use it for the front and back panels of the shirt, where it would be most visible. The sleeves, and cowl neck would be made from the t-shirt fabric.

Cut your pattern pieces carefully:
Front panel: patchwork fabric
Back panel: patchwork fabric
Sleeves: t-shirt fabric
Cowl neck: t-shirt fabric
Lay the t shirt down on the fabric. This will be your guide for the size and shape of the shirt.

Measure and mark the back and front necklines on the patchwork fabric and cut out the neckline opening using the the t shirt as a guide.

Measure the shoulder height and the size of the armhole opening .This t shirt fits me quite snugly so I added another 6 cm down on the patchwork to create a larger armhole because the patchwork fabric has no stretch. I also added 2 more cm to each shoulder on the patchwork fabric.

This is how I cut out the armhole


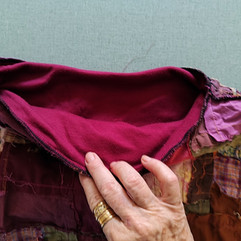
Creating the Cowl Neck
The cowl neck adds a soft, draped look that complements the patchwork front. Cut a rectangular piece of t-shirt fabric for the cowl neck, about twice the width of the neckline and the desired height.
To sew the cowl neck:
My rectangle was 60 cm wide and 70 cm high.
Fold the rectangle in half so that the width is 30, right sides together.
Sew the side to create a a long tube.
Fold the tube in half , wrong sides together.
Pin the raw edges of the cowl neck to the neckline of the shirt, matching seams.
Sew the cowl neck to the neckline, stretching slightly if needed to fit.
The cowl neck fabric will naturally drape, creating a cozy neckline that balances the patchwork texture.


Sewing the Patchwork Shirt Together
Sewing a patchwork shirt with mixed fabrics requires some adjustments:
Seam allowances: Use a slightly larger seam allowance on the patchwork fabric to accommodate bulk.
Stitch type: For the t-shirt fabric, use a stretch stitch or a narrow zigzag to allow fabric movement.
Joining fabrics: When sewing patchwork fabric to t-shirt fabric, use many pins and sew slowly and gently to avoid stretching the knit fabric.
Start by sewing the front and back panels at the shoulder seams. .Measure the desired length of the sleeves and cut out 2 sleeves shaping the head of the sleeve according to the armhole of the shirt.

Then attach the open sleeves to the armholes at the shoulders
Finally, sew the side seams and sleeve seams.

Then add a waistband. Create a tube from t shirt fabric the width of your hips and double the length that you want. Fold it double and sew the raw edges to the bottom of the shirt


The finished patchwork shirt

Finishing Touches and Tips for Patchwork Upcycled Clothing
Here are some tips I learned while making this patchwork shirt:
Mixing fabrics: Combining patchwork and knit fabrics works well when you use the patchwork as a focal point and the knit for comfort and stretch.
Color coordination: Choose knit fabric in a color that complements the patchwork to create a cohesive look.
Refashioned clothing: Using leftover fabrics reduces waste and gives your wardrobe unique pieces.
Experiment with shapes: Don’t be afraid to try different necklines or sleeve styles when working with patchwork remnants.
Why Create Patchwork Upcycled Clothing
For sewists who enjoy patchwork clothing, combining patchwork with other fabric types opens new design possibilities. It also helps use up those small scraps that accumulate after every project.
Creating this patchwork shirt was a rewarding way to use leftover fabrics and try a new sewing technique. The mix of patchwork and t-shirt fabric gave the shirt both visual interest and comfort. The cowl neck added a stylish touch.
If you have fabric remnants from past projects, I encourage you to experiment with patchwork upcycled clothing. Start small, plan your design, and enjoy the process of turning scraps into wearable art. Your next favorite shirt might be waiting in your fabric stash.
Find more upcycling tutorials here on Etsy - https://www.etsy.com/il-en/shop/PriganArt?ref=shop_sugg§ion_id=28357269
and here on the site - https://www.priganart.com/category/pdf-clothing-techniques


Comments